Flying Your Quantix
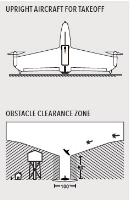
Place aircraft in an upright position near collection area. This will be the launch/land location and should have a minimum of 15 feet clearance around aircraft with a suggested safety buffer of 50 feet in every direction. This area must remain clear the entire duration of flight. The aircraft will launch vertically from this location to an elevation of 100 feet before switching to forward flight mode.
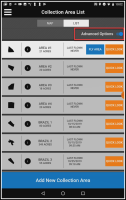
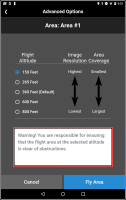
- (Collection Area List) Click Advanced Options at the top if you want to choose a different flight altitude. These options will be presented when you choose to fly a collection area.
(Collection Area List) Find the Collection Area that you want to fly and push Fly Area.
- The Advanced Options display is presented only if you have toggled Advanced Options on the Collection Area List.
 Select desired Advanced Options
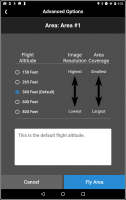
The Advanced Options allow you to override the default settings for a flight.
The default flight altitude is 360 feet.
The diagram on the Advanced Options illustrates the relationship between flight altitude, image resolution, and area coverage (i.e., the amount of area you can cover with a fully charged battery).
- At lower altitudes you get the highest image resolution, but will have to fly a smaller area.
- At higher altitudes you can fly a larger area, but will have the lowest image resolution.
- An informational message warns you that you are responsible for ensuring that the flight area is clear of obstructions at the selected altitude.
Push Fly Area once you are confident that it is safe to fly.
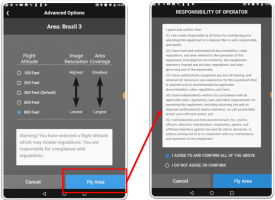
- An informational message warns you that your selected altitude may violate local regulations, and that you are responsible for compliance with any and all regulations.
Push Fly Area to see a RESPONSIBILITY OF OPERATOR agreement.
You must select "I AGREE TO AND CONFIRM ALL OF THE ABOVE" at the bottom of the agreement in order for the Fly Area button to be enabled.
- If you did not select to see Advanced Options, skip to the next section on Conducting a Preflight Check.
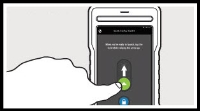
Once you have selected to fly a collection area, the Quantix™ application will guide you through a preflight check and launch procedure, including a final confirmation swipe commanding the aircraft to launch.
Choose a vehicle
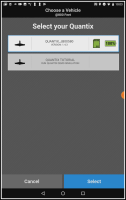
- After powering on your aircraft, you will be able to select it from the Choose a Vehicle display.
- You also have the option of selecting QUANTIX TUTORIAL if you want to first run a demo simulation. This may be a good thing to do at home before you fly to familiarize yourself with the preflight checks.
- Make your selection and push Select to advance to the next check.
If you select your aircraft, you will no longer see the QUANTIX TUTORIAL option until you shut down the app and aircraft and begin again.
System Check
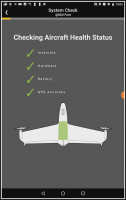
- Watch as the App performs vehicle health checks. The display will advance automatically if all checks are successful.
-
If all checks are successful, the screen will automatically advance.
Call or email Customer Service if you have questions regarding a system check failure.
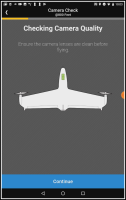
Camera Check
- Make sure that the aircraft camera lenses are clean before flying.
- Push Continue to advance to the next check.
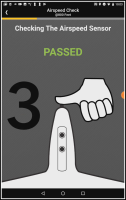
Airspeed Check
- Cover the vehicle airspeed sensor with your finger for a second as shown in the picture on the display.
-
When the airspeed check passes, the screen will automatically advance.
During Airspeed Sensor Check — Ensure thumb completely covers and seals sensor port on nose of aircraft.
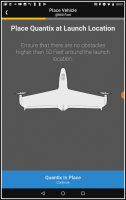
Place Vehicle
- Walk the aircraft to the launch location.
The launch location must correspond with the area that you selected to fly. If it is not, you will get a warning telling you to move closer to the launch location.
- Select Quantix In Place when you are ready.
Make sure there are no obstacles higher than 50 feet around the launch location, and that it is 50 feet away from your vehicle upon launch.
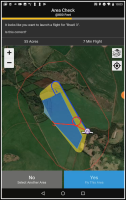
Area Check
- You are presented with a diagram of the flight.
- The blue area is the collection area that you have created and selected to fly.
- The blue looping line represents the path of the aircraft on take-off (the "ingress" path).
- The red looping line represents the path of the aircraft on landing (the "egress" path).
- The yellow area is the "Flight Zone" and encompasses the collection area and the ingress and egress paths (the looping lines).
- The red line surrounding the collection area represents a buffer of 350 meters around the Flight Zone. This is the "Keep In Zone". The Quantix should never fly outside of this area, and has logic to land in the event that it flies outside of the Flight Zone.
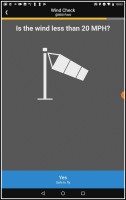
The Quantix should always fly within the yellow area unless high winds push it outside. This is why it is important to always fly with winds under 20 mph.
- Push Yes Fly This Area to advance to the next display.
Location Check
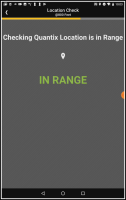
- The app will check that the aircraft is within range of the selected collection area and notify you if it is not. This display will automatically advance to the next check if the Quantix location is IN RANGE.
Battery Check
- The app will check the aircraft battery to make sure that the charge is sufficient, and will automatically advance once it says PASSED.
If the charge is less than 75% this check will fail, and you will need to charge the battery before proceeding.
Wing Check
- Watch your aircraft to make sure that the elevons are both moving. Select Yes Both Are Moving if this is the case.
Call or email Customer Service if your aircraft elevons do not move.
Wind Check
Air Traffic Check
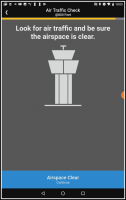
- It is your responsibility to make sure that there is no air traffic in the Flight Zone.
- Once you have confirmed this, select Airspace Clear.
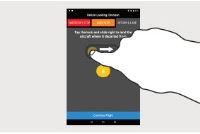
Final Check
- Check again to make sure that there are no obstacles in the flight area taller than 50 feet, and move back 50 feet from the launch area (outside the white circle displayed on the diagram).
Launch
Stop Lights
Your Quantix will update you on the status of the wind speed and the link from its current location and altitude.
Wind Speed Stop Light Indicators
- Green = less than 15 mph
- Yellow = 15-25 mph for 10 seconds
- Red = greater than 25 mph for 10 seconds
Link Stop Light Indicators
- Red = 80 db for 30 seconds AND range greater than 1250 meters
- Yellow = 80 db for 15 seconds OR range greater than 2000 meters
- Green = anything other than the above db and range specifications
Override Your Flight
Should it be necessary, there are three ways to override your flight:
- Emergency Stop
- Land Now
- Return and Land
